
Commercial Kitchen Deep Clean Checklist: UK Guide
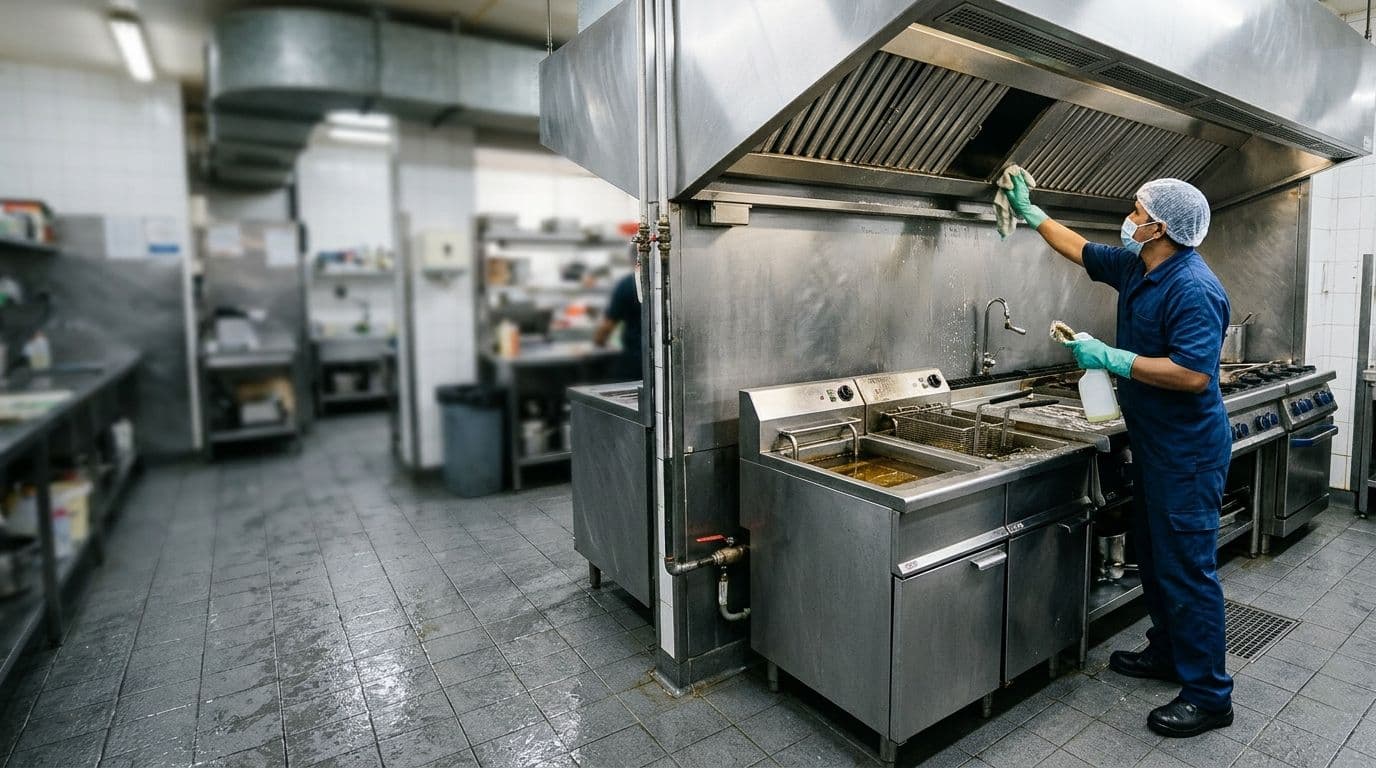
A commercial kitchen deep clean needs more planning than an end-of-shift wipe-down. The work may include extraction filters, cooking equipment, cold storage, drains, hidden floors and the spaces behind appliances—areas that are easy to miss when the kitchen is busy.
Use this commercial kitchen deep clean checklist to prepare the site, brief a cleaning team, organise your own work or inspect what has been completed. It is suitable for businesses in Bristol and Bath, and can be adapted by households with comparable equipment such as a range, extractor, oven, fridge and floor drains.
If you are arranging professional help, you can review Urban Cleaning’s commercial kitchen deep cleaning service before preparing your brief.
1. Confirm the scope before cleaning starts
Begin with a written list of the areas and equipment included. A useful scope should identify:
- Exhaust hood, canopy, filters and accessible surrounding surfaces
- Fryers, grills, griddles, ranges, salamanders and ovens
- Prep benches, splashbacks, sinks, shelving and food-contact surfaces
- Refrigerators, freezers, walk-in cold rooms and door seals
- Ice machines, bins and scoops where present
- Dry stores, racking, walls and less visible storage areas
- Floors, floor mats, drains and drain covers
- Spaces behind and underneath movable equipment
- Light fittings, ceiling vents and other high-level surfaces
Record areas that are not applicable rather than leaving them ambiguous. For example, a kitchen manager might write: “Walk-in cold room, hood filters, floor drains and the space behind wheeled fryers included.”
For a household, adapt the list to the equipment actually present. There is no need to include a walk-in cold room or grease trap if the property does not have one, but the same planning principle applies: define the work before moving items or dismantling equipment.
Prepare the kitchen
Before cleaning begins:
- Remove food, packaging, utensils and movable stock from the work area.
- Protect or relocate items that must not be exposed to cleaning products or loosened debris.
- Arrange suitable alternative cold storage before emptying a refrigerator, freezer or cold room.
- Identify equipment that must be switched off, cooled or handled according to its own instructions.
- Check that there is enough space to remove and identify filters, racks, trays and other components.
- Separate cleaning tools and cloths from food-preparation equipment.
- Agree who is responsible for each area and who will carry out the final check.
Do not force a component, move heavy equipment without a safe plan or begin emptying chilled storage without somewhere suitable for the stock to go.
2. Set the correct cleaning order
Work from high areas downwards and from less contaminated areas towards more heavily soiled areas where practical. This prevents debris or dirty water from falling onto work that has already been completed.
A sensible sequence is:
- Extraction canopy, hood surfaces and filters
- Ceiling vents and light fittings
- Walls, splashbacks and high-level surfaces
- Fixed cooking and preparation equipment
- Movable equipment and the spaces behind and underneath it
- Refrigeration, cold rooms and dry storage
- Drains and grease-prone low-level areas
- Floors, mats and floor edges
Keep removed parts together and identify where each part belongs. This is particularly useful for hood filters, oven racks, fryer components and shelving.
3. Follow the area-by-area checklist
Extraction hood and filters
- Remove filters only when the equipment is safe to handle.
- Soak filters using a suitable degreasing product in line with its label instructions.
- Scrub away loosened grease and residue.
- Rinse the filters and leave them ready for refitting according to the equipment instructions.
- Clean accessible canopy surfaces, edges, seams and grease collection points.
- Inspect the area behind the filters for accumulated residue.
- Check that every removed filter is correctly refitted before the kitchen returns to use.
Do not mark the extraction section complete merely because the visible canopy looks cleaner. Include the filters, edges and areas behind them in the check.
Specialist extraction work or separate maintenance may need to be arranged independently. Record this clearly rather than treating an outstanding item as completed.
Ovens, grills, ranges and fryers
For each item, work through the exterior, removable parts, interior and surrounding area:
- Remove loose food debris before applying a cleaning product.
- Degrease range exteriors, sides, knobs, splashbacks and drip areas.
- Clean grill or griddle surfaces according to the equipment instructions.
- Remove oven racks and clean them separately.
- Detail-clean oven interiors, doors, corners and seals where accessible.
- Clean salamander or broiler interiors and catch trays.
- Filter or replace fryer oil according to the kitchen’s established process before cleaning the surrounding equipment.
- Ensure a fryer is cool and safe before any internal cleaning is attempted.
- Clean fryer sides, handles, accessible pipework and the floor and wall behind the unit.
- Check that removable parts are correctly refitted and that no cleaning residue remains on food-contact surfaces.
A useful example is a fryer-area check that covers the range exterior, both fryer sides, the wall behind the bank, the floor beneath it and the accessible space between the appliances. Cleaning only the front panels leaves much of the grease-prone area untouched.
Prep surfaces and small equipment
- Clear prep benches and clean their tops, edges, undersides and legs.
- Clean splashbacks, joins and areas around taps and sinks.
- Wash, rinse and sanitise food-contact surfaces using the kitchen’s approved process.
- Clean and sanitise chopping boards, knives and utensils as appropriate.
- Dismantle and clean mixers, slicers, food processors and can openers in line with their instructions.
- Clean scales, handles, switches and other frequently touched points.
- Keep raw-food and ready-to-eat work areas separate during the clean.
- Replace deeply scored or damaged items where they can no longer be cleaned effectively.
Cleaning and sanitising are separate actions: remove grease and soil first, then apply the sanitising product as directed on its label. Do not assume that spraying a product onto a dirty surface completes both steps.
Refrigeration and cold rooms
Before starting, move food to suitable alternative storage and keep it identified and protected.
- Remove shelves, trays and removable storage components.
- Clean and sanitise shelves before returning them.
- Clean cold-room or refrigerator walls, floors and corners.
- Wipe door seals, handles and strip curtains where present.
- Remove spills and residue from beneath shelving.
- Check for damaged seals, standing water or other maintenance issues.
- Clean condenser areas only where this is safe and appropriate for the equipment.
- Return stock only after the relevant storage surfaces have been checked.
A complete cold-room example includes the shelves, seals, strip curtains, walls and floor—not just the door and the most visible shelves.
Ice machines
Treat ice-making equipment as a food-contact area. Before cleaning:
- Discard existing ice as appropriate for the cleaning process.
- Clean the bin, internal surfaces and scoop according to the machine instructions.
- Clean the exterior, handles and drip area.
- Check that components are correctly refitted before the machine is used again.
- Record any scale, slime, damage or maintenance issue that needs separate attention.
Storage, walls and high-level surfaces
- Empty dry-store shelves one section at a time.
- Remove crumbs, dust and spilled ingredients before wiping or sanitising surfaces.
- Clean shelf undersides, supports, racking joints and the floor beneath.
- Check for damaged packaging, expired stock or signs that need follow-up.
- Degrease walls and splashbacks around the cooking line.
- Clean ceiling vents, light fittings and other high-level surfaces before floors.
- Include the areas behind storage units where they can be accessed safely.
Drains and grease-prone areas
- Remove drain covers where this can be done safely.
- Clear visible food debris and build-up from covers and channels.
- Clean and sanitise removable covers according to the product instructions.
- Check that water can flow away without leaving an obvious obstruction.
- Inspect areas around grease traps and record when separate emptying or maintenance is required.
- Do not pour unsuitable products into drains or improvise if a blockage needs specialist attention.
A floor drain beneath a fryer bank and the wall behind the range should be listed separately from the general floor clean. This makes it easier to confirm that hidden grease-prone areas were actually checked.
Floors, mats and lower surfaces
Leave floors until overhead areas, walls and equipment have been dealt with.
- Remove loose food and debris first.
- Move equipment only where it can be done safely.
- Clean behind and underneath appliances, along wall edges and in corners.
- Scrub floor mats separately and check whether they need replacing.
- Degrease the floor using a product suitable for the surface.
- Clean around drain covers and low-level pipework.
- Rinse or remove residue according to the product instructions.
- Leave the area free from standing dirty water and record any damaged tiles, grout or flooring for follow-up.
4. Organise recurring deep-clean work
Not every task needs to be completed during one visit, but every included task needs an owner and a place in the cleaning cycle. Separate routine daily work from less frequent detailed tasks such as:
- Behind and underneath heavy equipment
- Hood filters and accessible canopy surfaces
- Cold-room walls, shelving and seals
- Oven, grill and fryer components
- Light fittings and ceiling vents
- Drains, grease-prone areas and floor edges
- Dry-store racking and hidden storage floors
A weekly or monthly cycle may be more practical than asking one shift to complete everything at once. For example, one cycle can cover hood filters and cooking equipment, another can cover cold storage and shelving, and a separate check can focus on hidden floors and drains.
Use a record with these fields:
- Area and individual task
- Person responsible
- Date completed
- Notes or exceptions
- Follow-up owner
- Manager or supervisor sign-off
Review the cycle when the kitchen layout, equipment, menu, opening pattern or cleaning responsibilities change.
5. Brief a professional cleaner clearly
A good brief reduces uncertainty before the visit. Share:
- The kitchen layout and access arrangements
- A list of fixed and movable equipment
- Which areas need to be included or excluded
- Whether the visit covers hood filters, fryers, ovens, cold storage, ice machines, drains, walls and floors
- Which equipment can be moved and which must remain in place
- How food and chilled stock will be managed
- Any parts that are damaged, difficult to remove or awaiting maintenance
- How completion and outstanding items should be recorded
For example, “clean refrigeration” is too broad. A more useful brief says: “Walk-in cold room—shelves, seals, strip curtains, walls and floor; stock will be moved before access is provided.”
If you are in Bristol or Bath, use Urban Cleaning’s commercial kitchen deep cleaning service to review the relevant service information, then contact Urban Cleaning Ltd to discuss the scope. Urban Cleaning Ltd serves Bristol and Bath and can be reached on 0117 332 1241, Monday to Friday from 08:00 to 17:00.
Do not assume that every appliance, hidden area or separate maintenance task is included unless it has been discussed and recorded.
6. Troubleshoot incomplete or unsafe work
Grease or residue remains
Do not sign off the area because it looks improved. Revisit the affected surface using the equipment and product instructions, or record it for follow-up if the item requires separate attention.
A removable component is damaged or will not refit
Keep the part identified and tell the responsible manager or an appropriate technician. Do not force it into place or return the equipment to use without resolving the issue.
Equipment cannot be moved safely
Clean accessible surfaces, record the inaccessible space and agree the next step. A blocked route or heavy appliance is a planning issue, not a reason to improvise.
Chilled stock cannot be relocated
Do not empty the cold room or refrigerator until suitable alternative storage has been arranged. Record the affected section and reschedule it if necessary.
Dirty water or debris reaches a cleaned area
Deal with the source first, then repeat the affected lower-level section. This is one reason to clean from high areas downwards and leave floors until last.
A drain or grease trap needs separate attention
Record it as outstanding with an owner and follow-up action. Do not mark the entire drainage section complete when a required emptying or maintenance task remains unresolved.
7. Complete the final inspection
Walk through the kitchen with the checklist, not just a general visual impression. Confirm that every included item is either complete, not applicable or recorded as outstanding.
Check the following:
- Hood surfaces and filters have been cleaned, checked and correctly refitted.
- Ceiling vents and light fittings have been included where listed.
- Walls, splashbacks and high-level areas are free from the recorded residue and debris.
- Oven, grill, range and fryer interiors, exteriors and removable parts have been checked.
- The spaces behind and underneath accessible equipment have been inspected.
- Prep surfaces and food-contact items have completed their cleaning and sanitising process.
- Refrigeration shelves, walls, floors, seals and strip curtains have been checked.
- Ice-machine components have been cleaned and correctly refitted where applicable.
- Dry-store shelving, supports and floors have been inspected.
- Drain covers and channels have been checked, with separate maintenance recorded.
- Floors, mats, corners and edges have been cleaned after the higher-level work.
- No loose parts, visible cleaning residue, dirty water or food debris has been left in an included area.
- Stock, utensils and equipment are returned only after their relevant surfaces have been checked.
- Every exception has an owner and a follow-up action.
The expected completion evidence is a dated, signed checklist with specific areas checked—not simply a note saying “kitchen cleaned”. Use the same document to brief a professional cleaner before the visit and to inspect the work afterwards. If you need help planning the scope in Bristol or Bath, review the commercial kitchen deep cleaning service or contact Urban Cleaning directly.